Monday, June 28, 2010

Mid Century Modern Curb Appeal - And The 'Crete' Goes On

I like to pour concrete, maybe one day we will pour some all the way out to the street. For now, in awaiting the new roof, I've been itching to work on some curb appeal outside. Alas while taking a week off last week, I impromtu decided to start throwing a sledgehammer at the existing walkway. Having complete two phases of concrete work on the porch and the landscape enclosure walls, I was thinking it was time to work on our patched walkway that leads to the house. Seeing as the sledge hammer wasn't doing much, I had to run and rent a jackhammer, a fun toy that can easily can get out of control.

In these first couple of photos, note the existing curvilinear walkway with a temporary patch we did to tide over the previous demolition. The plan was to infill the corner with four long walkway pads and also extend the lefthand planter enclosure. Eventually we will pour more stepped beds around the side of the house, the new extension will be right next to our property line.


A couple sweaty hours later, I had the existing walkway out to the next expansion joint. The design allows us to be able to keep the existing walkway and the existing expansion joint lined up almost perfect with the pavers in the grass. It was right about now, the crane truck with the roofing materials showed up for delivery.


While there was a ladder out I headed up to the roof to grab an aerial shot for a little perspective. Shadow was unavoidable.


My next step was to layout the overall outline for excavation and dig out the existing grass. Then I had to place 4" gravel fill and compact with a hand tamper. Using some of the demoed concrete and some already on hand gravel, everything worked out about perfect.


For forming up the concrete, I framed the outline of the pads using 2x6's so that the pads would be thicker and have a little more hefty presence. Using a double 2x6's in between the four pads, we'll eventually fill the gaps with dirt and plant grass. This will require some regrading down the road.

Moving on to the planting bed, the new wall enclosure steps down equally with the steps so they both are extensions on plane with one another. Using coated plywood and 2x4' I created a 6" wide and 18" deep wall form. As this was the end of the first day I didn't make it to bracing and fully leveling the frame. Not bad for a day's work.


The next morning I braced and leveled the wall forms, piled a ton of concrete chunks in and around the base. Then I piled all the soil I dug up from the front walkway pad excavation around the outside base of the formwork. My uncle Ed, the concrete finishing master, stopped by to help me out on the day of the pour. I use a Mini Mix truck company for the concrete, the smaller truck does less damage to the landscape. We started the pouring with the walls on the side.

Next we filled the pad formwork. It was a super hot day so we had to move quick. After filling the forms we had to manually tap the sides with hammers to help fill any voids, then we screeded the concrete level. We then floated a smooth finish, edged the sides, and finally Ed finished the concrete with a rubber float. Ed has done the same hand finish to all the concrete work we've done so it was best left to his artful hand.


A day's work done, the concrete bakes away into the evening sun.


Here's a good view of the side wall and all it's bracing glory. Didn't budge hardly at all during the pour, but it's suprising how powerful the concrete filling the forms can be.


Yesterday I pulled the formwork off both poured pieces and stored the formwork for future use. Here's a view from the neighbor's yard for a little perspective on the overall additions. Don't mind all that roofing material up on the roof.


Another final view of the approach. Next we'll get to work on the grass seed and grading with some fresh topsoil. First, we'll let the roofers make a big happy mess.

Saturday, June 26, 2010

New Flat Mid Century Modern Roof arrives

Earlier this week, the new roof arrived in the form of many materials loaded up on a crane truck. We've had a very rainy Spring and early Summer which has delayed the roof start by a couple of weeks. I'm patient to wait for good craftmanship. When the call came and the truck showed up, a sweet sigh of relief started to take hold. The anxiety of flat leaky ponding roof causes a little stress, for me anyway. To the left you can see a pretty nice load of materials, most of it consisting of the rubber membrane rolls, tapered insulation, and lots of miscellaneous roofing materials on pallettes.

The kids in the cul de sac got to witness delight as the crane extended its arm and started lifting and dropping. First came a heavy load of the 3/4" T&G plywood. I was at Lowes the other day picking up concrete form wood and saw this stuff was $20 a sheet, sheet is right. The weight of the plywood is too much for the roof, so it will reside on the driveway.


The heaviest materials going on the roof are the rolls of EPDM rubber, as roofer lingo goes, 10 squares. A square being a 10' x 10' area of roofing material. It was funny as the roofer said they're going to put the heavy material on the load bearing walls, we only have one loading bearing wall on the upper floor. That's the way it goes with expansive space I guess.


I decided to get up on the roof to get some better perspective. There are some remains of the water ponding the roof company workers swept off. Finally it wasn't me sweeping the roof off. Hopefully I'll forget I ever did soon.


Here's a shot of a few pallettes of tapered insulation. Although very light, this is the key to the success positive drainage of our new roof.


A last look at the super swank 3-Dimensional
shingles on the sloped section of the roof. You can see the large saw the roofers are going to use while stripping the existing roof by the chimney and the many gallons of membrane adhesive. The materials are about half the cost of the roof to give some perspective.


Truck empty and ready to ship out. We are about to dig in to the largest project ever here at Westminster. Looks like Tuesday will be the official day to start, the weather forecast looks clear for the next few days after that.


Here's a last look at the roof loaded up from the street. We are getting a lot of enthusiast feedback from passerbys in the neighborhood. A
s I have declared a moratorium on any interior work until the roof is done and not leaking, I couldn't help myself and decided to pour some more concrete landscape work, more later. Be sure to check out more updates of current goings ons around Westminster on CincinnatiModernation's facebook page.


Wednesday, June 23, 2010

New Flat Roof Does Cometh - Replacing our MCM flat roof preview

We're doing it. It's been a long time coming, mostly left to procrastination, but finally busting through our priorities in the form of water dripping onto the floor, the flatness that is our roof will be no more. A crew is going to rip the entire roof off the house, down to the rafters. Before they do, let's take a look at where the roof condition is at, what the problems are, most likely what you're roof problems might be, and then examine what we're going to do. To start, we had the flue cleaned a couple weeks ago. Considering we're getting a new chimney cap, I thought this might be good to get out of the premptive way, plus it's a pleasant picture to start with.

Here's said chimney, and it ain't your regular size chimney that can have a cap ordered from most standard catalogs, our chimney is 12 friggin feet long. In the distance you can see our next door neighbor's red chimney cap. We are getting ours custom made to be similar, a 12' x 3' sheet of metal in the wind will need more braces = more cost. In the end it will save our chimney that currently leaks and needs some mortar work in the long term. We also having it painted grey with high temperature tolerant silicone alkyd paint, say that fast three times.

Okay, so as you can see in the next few photos we have issues. These shots are within a couple hours of some major rain downpours. First and most obvious, the water is just sitting on the roof, not draining. Basically the sun eventually evaporates the water puddles, or it rains again and the process starts over, pretty cool huh? We also have had way too many patches and too many seams. Nonetheless the major problem is insufficient slope to the drains. Water has infiltrated the many roof membrane layers, trapped, the roof is a big sponge.


We have a sloped section of roof that wins the championship of most roof layers in one area. It has four, the final layer being some lovely three dimensional shingles, which shouldn't be used in this low slope application, and can't really be seen for their Gened-up-ness. So what are we gonna do? Sit back and watch a professional contractor do a damn good job replacing the entire roof.


Here's the deal, after they rip all 3 of the existing roof layers off they will place R-19 batt insulation (the pink stuff) in the roof cavity, we have no insulation right now due to the experimental radiant ceiling heating system that's long since been abandoned. The new plywood deck will be 3/4" T&G glued and screwed to the wood structure. A tapered insulation system, sometimes several inches thick, will provide a minimum 1/8" per foot across the entire roof to our four existing drains. Heavy duty .060
EPDM reinforced black membrane will be adhered to the tapered insulation.

Since the existing redwood fascia is covered with Gened-up beige aluminum, this will be removed to expose the original redwood for remediation and painting around the entire perimeter of the roof. A level coping will cap the membrane to redwood connection. All of which will be dark grey to match our previous curb appeal work. At left is a great example of the poor workmanship of the last roofer where our sloped roof meets the flat roof. Remember this photo for the 'after' shot.


A few final shots sweeping the roof for one final look before things begin to make major changes. This will be the last time hopefully that I have to sweep off the roof and look like a crazy MCM homeowner. I plan to post our progress as work progresses. Actually the materials were delivered yesterday, which forced me to crank this post out. For a teaser of what's coming, check out CincinnatiModernation's facebook page and become a fan.


Monday, June 21, 2010

Columbus Indiana Wallpaper Teasers

Two weekends ago, bloggers from around the country descended on the nation's 6th ranked design city that is Columbus Indiana for a weekend of Modern Architecture touring, yep capital M, capital A touring. Before proceeding, many thanks must be given to Lynn Lucas & Cindy Frey of the Columbus Area Visitor Center for hosting all of us to such an elaborate weekend. Also many thanks to fellow MCM blogger Baz of Atomic Indy for all his organizational efforts.

Maybe you were following along the Columbus instant update Twitter rampage, maybe you have caught up a bit since having reviewed other blog posts to the weekend's design treats. Below are some teaser shots from the touring intended for 'wallpaper' use to wet your appetite a bit for some future Columbus posts. I've uploaded these as large as Blogger will take them, right click, set as background, at will.

Group photo of all the fab bloggers posing on vintage Bertoia furniture. Check out the photo on my facebook page for a list of who's who in the photo. Now onto the wallpapers . . .


Pipe Organ - First Christian Church, Eliel Saarinen, 1942


Light Fixture - First Christian Church, Eliel Saarinen, 1942


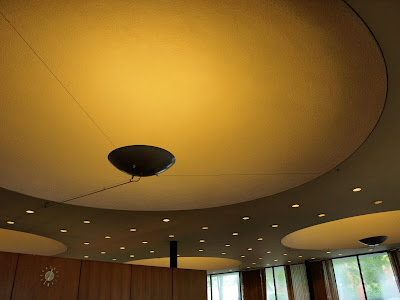
Light Domes - First Financial Bank (formerly Irwin Union Bank and Trust), Eero Saarinen, 1954


Staircase - First Financial Bank (formerly Irwin Union Bank and Trust), Eero Saarinen, 1954


Bartholomew County Veterans Memorial, Thompson & Rose Architects, 1996


East Wall - First Baptist Church, Harry Weese, 1942


Oculus detail - North Christian Church, Eero Saarinen, 1964


Detail - North Christian Church, Eero Saarinen, 1964

Friday, June 11, 2010

Cincinnati Modernation goes on the road to Columbus Indiana

This weekend, yours truly gets to represent Cincinnati in Columbus Indiana on a special tour organized for architecture and design bloggers from around the country. This includes a sneak peek at Eero Saarinen's Miller Residence. Rest assured many photos and reports soon to follow. In the meantime check out Columbus' facebook page here.


Also be sure to check out Cincinnatimodernation's facebook page here and become a fan of both today!

Monday, June 7, 2010

Mid Century Curb Appeal - DIY Modern Screen Wall

My mock up of our new Mid Century Modern screen wall withstood the entire winter and spring with hardly a nudge. I guess I wasn't expecting much from a over thousand pounds of concrete block. This project was part of our Curb Appeal series that we left last fall I finally got around to setting this puppy in place and figured it was a good opportunity to explore a 'how to' blog post highlighting my process of something from start to finish. Before proceeding, please refer to the Gened up 'before' scenario here, a long overdue green lumber fence, no thanks Gene.


Although the mock up wall, freestanding by none other than its own weight was doing okay, the plan was to 'set' the wall permanently and level it out. The mock up revealed the concrete base wall we had poured was not exactly level in either direction. This photo shows the wall out of plumb about an inch with the blocks 'stepping' a bit indicating the wall was leaning the other way as well. The plan was to use a bed of mortar on top of the concrete wall to use as a leveler and then glue the blocks together. Technically the wall would need to withstand a 250 lb point load to any point of the wall. I have mucho faith in Gorilla glue.


My entourage of equipment included (1) 10 lb bag of mortar mix, 4' & 1' levels, knee pad, bucket, drop cloth, rubber mallet, (cold chisels), trowel, brush, rubber coated gloves, and of course the glue.


Although not pictured, the wall screens our electric meter (previously on the front of the house), and our trash/recycling bins not shown in any of these photos. One of the main reasons I chose the block I did is the transparent nature of the block once the leftover concrete in the holes starts to come out. The tedious task of busting all the holes out was the first thing in line.


I tried a couple of ways to knock the concrete out of the holes, it ended up that my super long handy dandy chisel was the best tool for the job. I threw down the drop clothes to catch all, make that some of the debris and went to town.


Along the way to feel some sense of progress, I started disassembling the blocks. This also gave me the chance to brush off and clean the blocks of little grit and debris before their final placement.


As I'm more than halfway through at this point I started having fond memories of picking through the pallette of blocks at the store to find all the perfect ones. Then had to make two trips with the wagon to get them home, the car was on the ground for both trips. At each block weighing 23lbs, 56 blocks = 1,288lbs total moved 6 times = sore back.


Once the block was removed, it was time to dig into the leveling issues. As suspected there was a heavy 1/2" lean going down towards the house and slightly towards the rear of the house.


After quickly mixing up the small batch of mortar in the bucket by hand, I recalled all of my lessons from 'This Old House' episodes and threw down my best version of a base mortar bed using my hand trowel. Before doing so I was sure to get everything nice and wet to keep the moisture in the mortar. Also made sure not to use all the mortar so I could fill in the face gaps after setting the block.


After getting the mortar base down it was time to wiggle the block into place and level across the wall at the same time. Sounds simple with just a 4 block width, but it took a few time and adjustments to get it right. This was the most difficult and time consuming part of the job.


Since the block will have some thermal expansion with the change in weather, I made sure to leave a little space between the blocks. Working from one side to the other the base course was set. I then filled the needed gaps in the mortar and hosed off the driveway, it was time for the fun part.


You might have to enlarge this photo to see the Gorilla glue dots, 10 per block. Since water activates this glue I kept the block nice and soaked between each course. The weight of the block is enough to keep the glue from rising which it tends to do. I also decided to glue the wall freestanding and not anchored to the house. The brick will move independently of the block so there was no sense in creating a problem.


About halfway up, I'm avidly awaiting the cover up of the electric meter. Along the way I double checked the levelness and alignment like a hawk. End was in sight.


The finished job to the right still in the process of drying. I gave it a couple days to set up and with a lack of fancy scientific measuring devices, I physically tried to push the wall over, no dice. This beast is solid, freestanding on its own, and in the event the next homeowner could somehow conceive of the notion to knock it down some day, it wouldn't affect the house. But why would someone do that?